

Breaking the Frame
- Sarah Gray
- Mar 12
- 3 min read
I thought that I would share my process for making a few cards for this month's Take 3 Challenge where the inspiration prompts are: B&W + 1 colour, Bird and Stamping.
I have made 2 very different styles of cards but they both feature a compositional trick that I often use to create a bit of visual interest or movement on my projects - I call it 'breaking the frame' where elements sit outside of the main frame on the page. This can make them stand out as a focal point as they are not where they are 'supposed' to be or can help draw your eye across the design by creating a visual direction of travel.

Let me share how I made these cards.
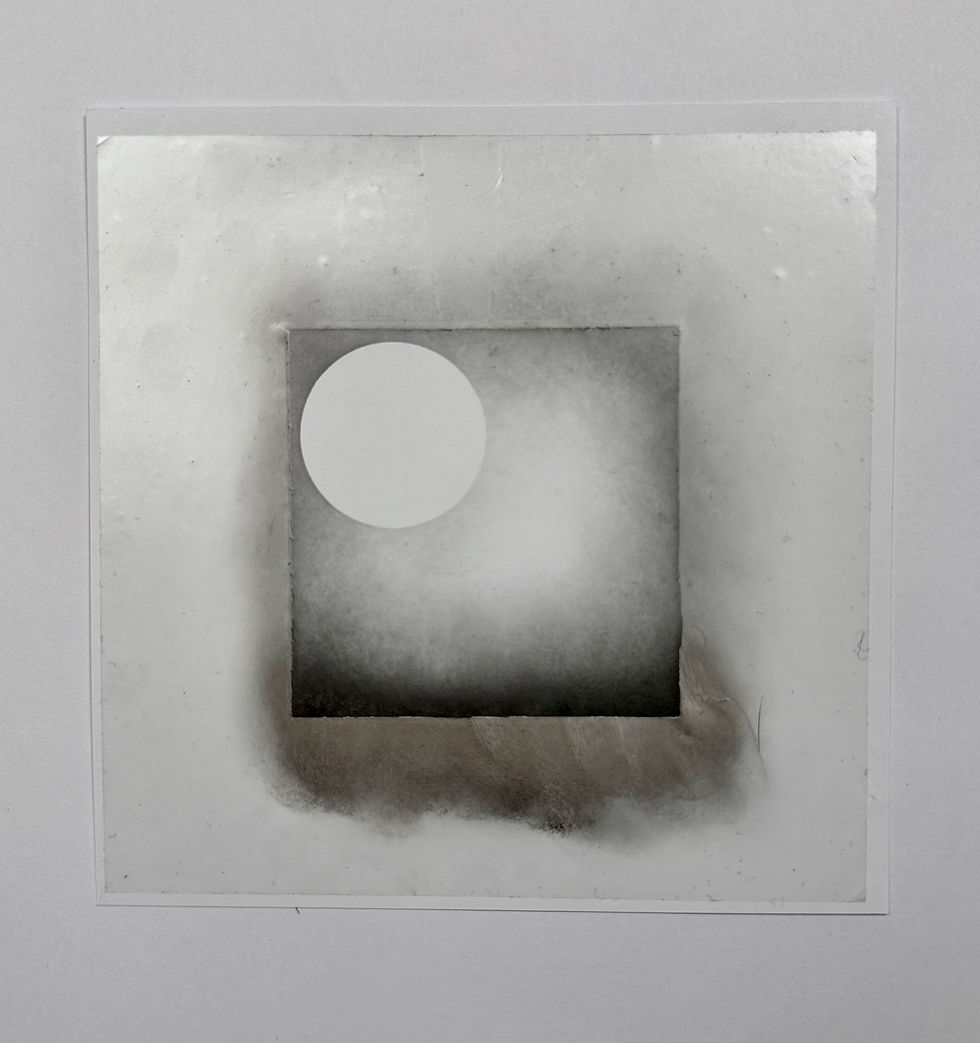
On the first card I did some simple masking and soft inking with distress ink around the edge of the aperture. I lifted the circle mask and replaced it with the circle aperture to add some warm colour in to the sun. Before I lifted the frame aperture I stamped some of the foliage from our A5 Inky Botanicals stamp set around the edge, using first and second generation stamping for extra depth. Although the inky bloom stamps are quite big, it is amazing how you can add small elements of them to work on a smaller design.


So now that we have elements grouped within the inked aperture, we can break the frame by adding some stamped florals at the front of the design. I used the Inky Botanicals again and the larger image brings it to the front of the page.

Adding some stencilling in the opposite corner carries the eye diagonally across the card which, along with the single pop of colour keeps a minimal one layer design interesting.

I added a black mat and a sentiment sticker to complete this card but it would look equally good in a frame as well :)
For our pigeon card, I created the frame by die cutting a square from our MonoDoodles paper pad (perfect for black and white makes!) but I wanted the colour from the Make It Splatter Stencil to extend outside of the aperture.


To do that I simply inked over both the aperture and frame at the same time - using a few shades of green to create a bit of interest. I popped our What Are You Looking at A7 pigeon at the front and before I adhered the frame with foam tape I stamped some of the cool A7 Fuzzy Numbers in the frame. This card was very easy to do but extending the stencilling between the aperture and outer frame adds a bit more dimension.
Although simple, this can be an effective way to create the illusion of layers on your projects and, of course, the frame could be any shape. Play with your circles, hearts, silhouette stencil apertures for different looks.
So, it is back over to you to share your makes for this month's Take 3 Challenge.

I hope my post today has given you some ideas to use in future projects - whether they be cards, journal pages, home decor or other makes.
Products used:
Thank you for reading!


Love both cards, rather partial to a pigeon as you know! Always makes a great card when you have things coming out of the frame. Xx